

how to remove duplicates in google sheets
If you are a regular Google Sheets user, you have probably run into a problem where you accidentally added duplicate entries into your spreadsheet. This situation can throw off the dataset you have been working so hard to put together. You may not know that the instance occurred, especially when your PC goes haywire or when you bump the trackpad on your laptop.
In any case, it is all too easy to miss something when there is a massive amount of data in your spreadsheet. Typical results include calculation errors and duplicate cells that are difficult to identify when searching for the source of the problem.
Fortunately, there are several different methods available to highlight duplicates inside your spreadsheets.
- Use the built-in Remove Duplicates Feature.
- Use highlighting to find duplicates.
- Copy unique cells and move them to a new sheet.
- Use a third-party duplicate finder.
- Create a Pivot Table that counts duplicates on an individual basis.
The above processes make it easier to find those duplicate entries so that you can delete them or ignore them if they match but are not duplicates. Here's your options.
Use Google Sheets' Remove Duplicates Feature
Whether you are trying to find duplicates in one column, two columns, or an entire worksheet, the Remove Duplicates feature accurately removes cells with the same data. However, be aware that it removes all duplicates, even if they are not associated with the same data.
- Highlight the columns you want to check for duplicate data.

- In the menu at the top, select Data, and then choose Remove duplicates.

- A dialogue popup will appear. Mark the boxes next to each column in the list that you want to check, or you can check off Select All, and then click Remove duplicates.

- Google Sheets displays how many copies were found and removed so that you can ensure the process worked as intended.

Using Google Sheets' built-in "Find and Remove Duplicates" feature is the most straightforward way to eliminate duplicates, but sometimes, you might want to review the copies before removing them. A great way to do that is with color highlighting.
Highlight Duplicates using Colors for Easy Removal
When it comes to identifying errors in your spreadsheets, using highlights to spotlight any incorrect information is another good way to go.
- Open your Google Sheets file and select the column or columns you want to sort.

- In the menu bar at the top, select Format.

- In the drop-down menu, select Conditional Formatting.

- Select the range you want from the new menu that appears.


- Under Format Rules, change the drop-down section titled Format cells if… to Custom formula is.

- Paste the following formula into the box located under the Custom formula is option:
=countif(A:A,A1)>1.

- Under the Formatting style section, select the Fill color icon to highlight your content with a yellow (or any color of your choosing) cell background.

- Click on Done to save changes.
Your spreadsheet will now highlight your duplicate cells in the color you chose, and you can scan the selection for any duplicates.
Note: It is best to highlight a column's cells starting with row 1 rather than choosing cells in the middle. The formula does not like using row 2 as the first column. It missed a couple of duplicates in the selected field (A2:B9). Once row 1 was added (A1:B9), it found all duplicates. See the two images below.
Image #1: shows missed duplicates when selecting row 2 cells as the first cells (A2 and B2):

Image #2: shows all duplicates while selecting row 1 cells as the first cells (A1 and B1):

Make sure that any existing duplicates are correct, as some copies are not copies at all. They can be the same number for two different accounts, users, employees, or anything else. Once you confirm the copycat cells that you do not need, delete them. Finally, you can close the formatting menu and restore the standard color to your cells.
Copy Unique Cells in Google Sheets for Easy Removal of Duplicates
If you prefer to sort your raw data automatically, it is best to copy all unique cells rather than duplicate ones. This process delivers faster sorting and filtering. If you are sure that your information is correct and would prefer to remove the duplicates instead, try the method below.
- Open the Sheets document you wish to sort and highlight the column you want to edit. This process will record the column range for the next step.

- After highlighting a column, click on a blank one where you want the unique entries to appear. Paste the following formula in the formula input box at the top of the document:
=UNIQUE()
- Type the cell coordinates of the original column inside the parenthesis, such as: (
A3:A9).
- Hit Enter to move your new data to the column you designated earlier.

Once this is complete, you can either check entries manually or import your data into your working spreadsheet.
Use a Third-Party Add-On to Find and Remove Duplicates in Sheets
There are online plugins available for use with Google Sheets. You will find the add-ons in the Google Workspace Marketplace, including tools for removing duplicate entries automatically.
Remove Duplicates by Ablebits
A suitable tool known as Remove Duplicates by Ablebits allows you to quickly find duplicates throughout an entire sheet of information or by searching up to two columns at once.

You can move, delete, and highlight results. The tool includes two wizard setups: find and delete duplicates and find unique cells or qualities within your document. These two options make it easy to track the information as you go.
Overall, using a wizard tool to find your information might be worth it in the long run. This statement is primarily for users who are continually looking for duplicates in their spreadsheets and would rather spend their time doing something else.
Use a Pivot Table to Find Duplicate Rows in Sheets
A pivot table is a convenient tool for looking more closely at data. A pivot table does not automatically delete duplicate cells or rows; it provides a breakdown of which columns have duplicates so you can manually look at your data and see what, if anything, you need to remove.
Creating a pivot table is a little more involved than the other methods shown in this article. You have to add a pivot table for each column to ensure the results are uniform and accurately identify duplicates.
Note: If you don't have column names in your spreadsheet, pivot tables will not work accurately to find duplicates. Try adding a new row temporarily, and then name the columns using that new row.
Here are the steps to use a pivot table to identify duplicate cells or rows.
- Select all the table data, then go to Data > Pivot Table.

- Adjust the cell range if needed, then hit Create.

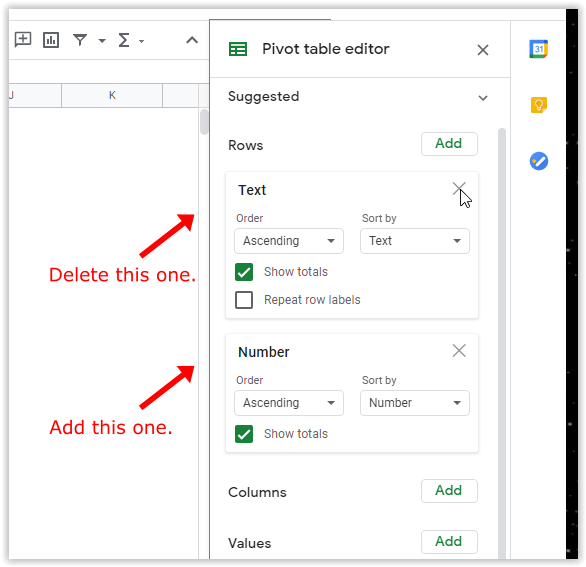
- Select Add next to Rows. This step will choose the column for finding duplicates. Yes, you read that right. Select your desired column from the drop-down menu. If you lose the pivot table editor, click on a populated cell to bring it back.

- Now, select Add next to Values and choose the same column as above, but set it to summarize by COUNT or COUNTA. It should already be the default.

- The new pivot table will identify duplicates, as shown below.

- If you want to view a different column, you can redo the steps above (to preserve your previous results) or reopen the pivot table editor and then change the existing table.
- The pivot table will change to show the new adjustments.

As previously mentioned, the pivot table method is a little more involved. Still, it gives you a specific report about your duplicate entries' locations, which can be very useful for doing data analysis. For more information on using pivot tables, see the TechJunkie tutorial on creating, editing, and refreshing pivot tables in Google Sheets.
Overall, a duplicate cell in Google Sheets can cause problems with your data if you're not careful, especially when trying to sort financial information into a useful spreadsheet.
The most common causes for duplicates are:
- Several people added the same customer, invoice, category, item, etc.
- Data imports get added to already-present data a second time.
- Copy/paste actions added duplicate entries.
Luckily, identifying, removing, and deleting identical data cells are surprisingly easy in Google Sheets, something that is positive if you are continually dealing with spreadsheets in your day-to-day workflow. If you are looking for something to sort your content better, you can always use an add-on like Remove Duplicates by Ablebits to ensure your information is well-sorted and well organized.
Wrapping Up
Do you have any experience, tips, or questions about using any of the methods mentioned in this article? Let us know in the comment section below.
how to remove duplicates in google sheets
Source: https://www.alphr.com/highlight-duplicates-google-sheets/
Posted by: allenappe1965.blogspot.com
0 Response to "how to remove duplicates in google sheets"
Post a Comment